Christmas is wrapped

Despite the heat, rain and humidity, this year's Christmas was really wonderful- relaxed, happy, delicious and fun. 

Nanny's cranberry sauce, served in one of the bowls she always used for it.

Nanny's cranberry sauce, served in one of the bowls she always used for it.

The kids received two light sabers a piece and these masks and have continued to reenact The Force Awakens, mostly channeling their inner dark sides. They even enjoyed a spectacular nighttime saber battle last night before we all watched The Bishop's Wife and then waddled sleepily off to bed.

FN2187 and Kylo Ren

FN2187 and Kylo Ren

Today was spent resting, enjoying the experience of it not raining, and playing with gifts. 

I dove into Between You & Me: Confessions of a Comma Queen, the book that Jack gave me. Yes, I'm a complete grammar nerd and thus far am loving the book ].

We gave my brother-in-law a camera-outfitted drone, and he's been like a kid in a candy store since opening it. I love watching adults unleash and let fly their inner kid flags. Today was spectacularly windy and the drone got stuck in the upper reaches of pines and oaks not once or twice but three times.

Each time, the ladders were erected in the hopes that tall men would gain enough height to shake the drone free. Alas, no.

The women went inside, chuckling but also wishing to avoid witnessing what was surely to come, and outside, someone -one of the kids?- suggested tying a long rope to an arrow and using a bow (the boys and T got archery sets two Christmases back and still love to target shoot) to launch the arrow into the tree. Could the arrow knock the drone down? Or, if the arrowhead stuck tight into a near branch, could someone then shake it enough to loose the toy?

My brother-in-law yanking on the rope tied to the arrow that Tom successfully shot into the branch on which the drone was stuck.

My brother-in-law yanking on the rope tied to the arrow that Tom successfully shot into the branch on which the drone was stuck.

People, it worked. All three times. I have no idea what the neighbors imagined was going on over here, but no one said anything. Getting it out was team work at its best. Also, watching the drone-freeing was hilariously amusing.

I'm off to bed now but wanted to leave you with another bayou pic. Hope you're all happy and well!

Hosting yet another Star Wars birthday party

Despite having already hosted three Star Wars birthday parties, my boys' love of Jedi, Sith and the Force remains strong. As such, as my Ol approaches 6, we celebrated with a fourth Star Wars (SW) shindig. 

You might recall my previous summation, Hosting a Star Wars Party For a Seven Year Old, which detailed my first foray into SW celebrations. Great party, and I've built on that foundation since. 

To avoid boredom and repetition, I've upped the ante for each party: different invitations, a variety of decorations, new saber hilts and never the same cake twice.

Whether you're hosting your first SW party or your fourth, here are some more creative ideas to consider.

Light Saber invitations

I saw a picture of these on Pinterest and decided to recreate.

moveable Light Saber invitations

moveable Light Saber invitations

I like them because they move which is a fun feature and because they still fit in a standard envelope. I made cardboard models for all the pieces (there were about seven), traced those onto colored cardstock, glued things together and bought a party info stamp to minimize what I needed to write.

Cardboard models of each piece; makes tracing convenient.

Cardboard models of each piece; makes tracing convenient.

The "mechanism"

The "mechanism"

I used a sparkly black pen to write on the green saber blades, and a silver Sharpie to address the black envelopes. Paper Source was my source for all supplies. 

Star Wars decorations

From Amazon, we bought a bulk box of 20" x 30" foam core boards. I wanted these to make the wings for two TIE fighters: the standard TIE and Darth Vader's personal plane. I also bought some 10" paper lanterns to use as the cockpits for the planes and a 16" paper lantern to make the Death Star.

One foam core board divided in half, width-wise, yielded two 15" x 20" boards which I scored and had Tom bend and secure into the shape of Darth's TIE wings. Recreating the standard TIE's hexagonal, but not uniformly so,  wings took about two-thirds of one large board, so the standard TIE actually required two boards.

crafting a standard TIE fighter

crafting a standard TIE fighter

That was fine because we used the excess to create the supports that held the paper lanterns to the wings and also kept Darth's bent TIE wings in place. We just hot-glued all that together.

It took nearly two cans of matte gray spray paint to cover the planes and Death Star completely. T cut a thin dowel into seven pieces, spray-painted them bright green and finagled them together with hot glue and a prayer to make the laser burst, death ray coming from the Death Star. The depression was made by gluing a small Whole Foods plastic container into the hole of the paper lantern.

16" paper lantern painted gray; plastic Whole Foods container glued into the lantern hole and attached to a wooden, painted-green array of wooden dowels.

16" paper lantern painted gray; plastic Whole Foods container glued into the lantern hole and attached to a wooden, painted-green array of wooden dowels.

Vader's TIE fighter

Vader's TIE fighter

Light Sabers

You've seen them before: swim noodles cut in half, hilt wrapped in duct tape, and then detailed with strips of foil tape. These are always a hit, and you can rest assured that the kids will expend great deals of energy beating each other up without really harming one another. 

Now, because I simply did not feel inspired to come up with yet another, totally different Star Wars-themed cake, I embraced Oliver's St. Patty's Day birthday and crafted him a pot of gold. He was thrilled!

How is he about to be six??

How is he about to be six??

DIY Light Sabers

Fellow Star Wars obsessees...do you find yourself with too few light sabers at your disposal? Do you wish for both more and a better variety? Do you long for personalized hilts a la your favorite characters? Though I never thought I would be the one to share this information with you, I am here to say that with basic trips to pool and hardware stores,  you can, in one afternoon, have an enormous selection of sabers at your disposal.

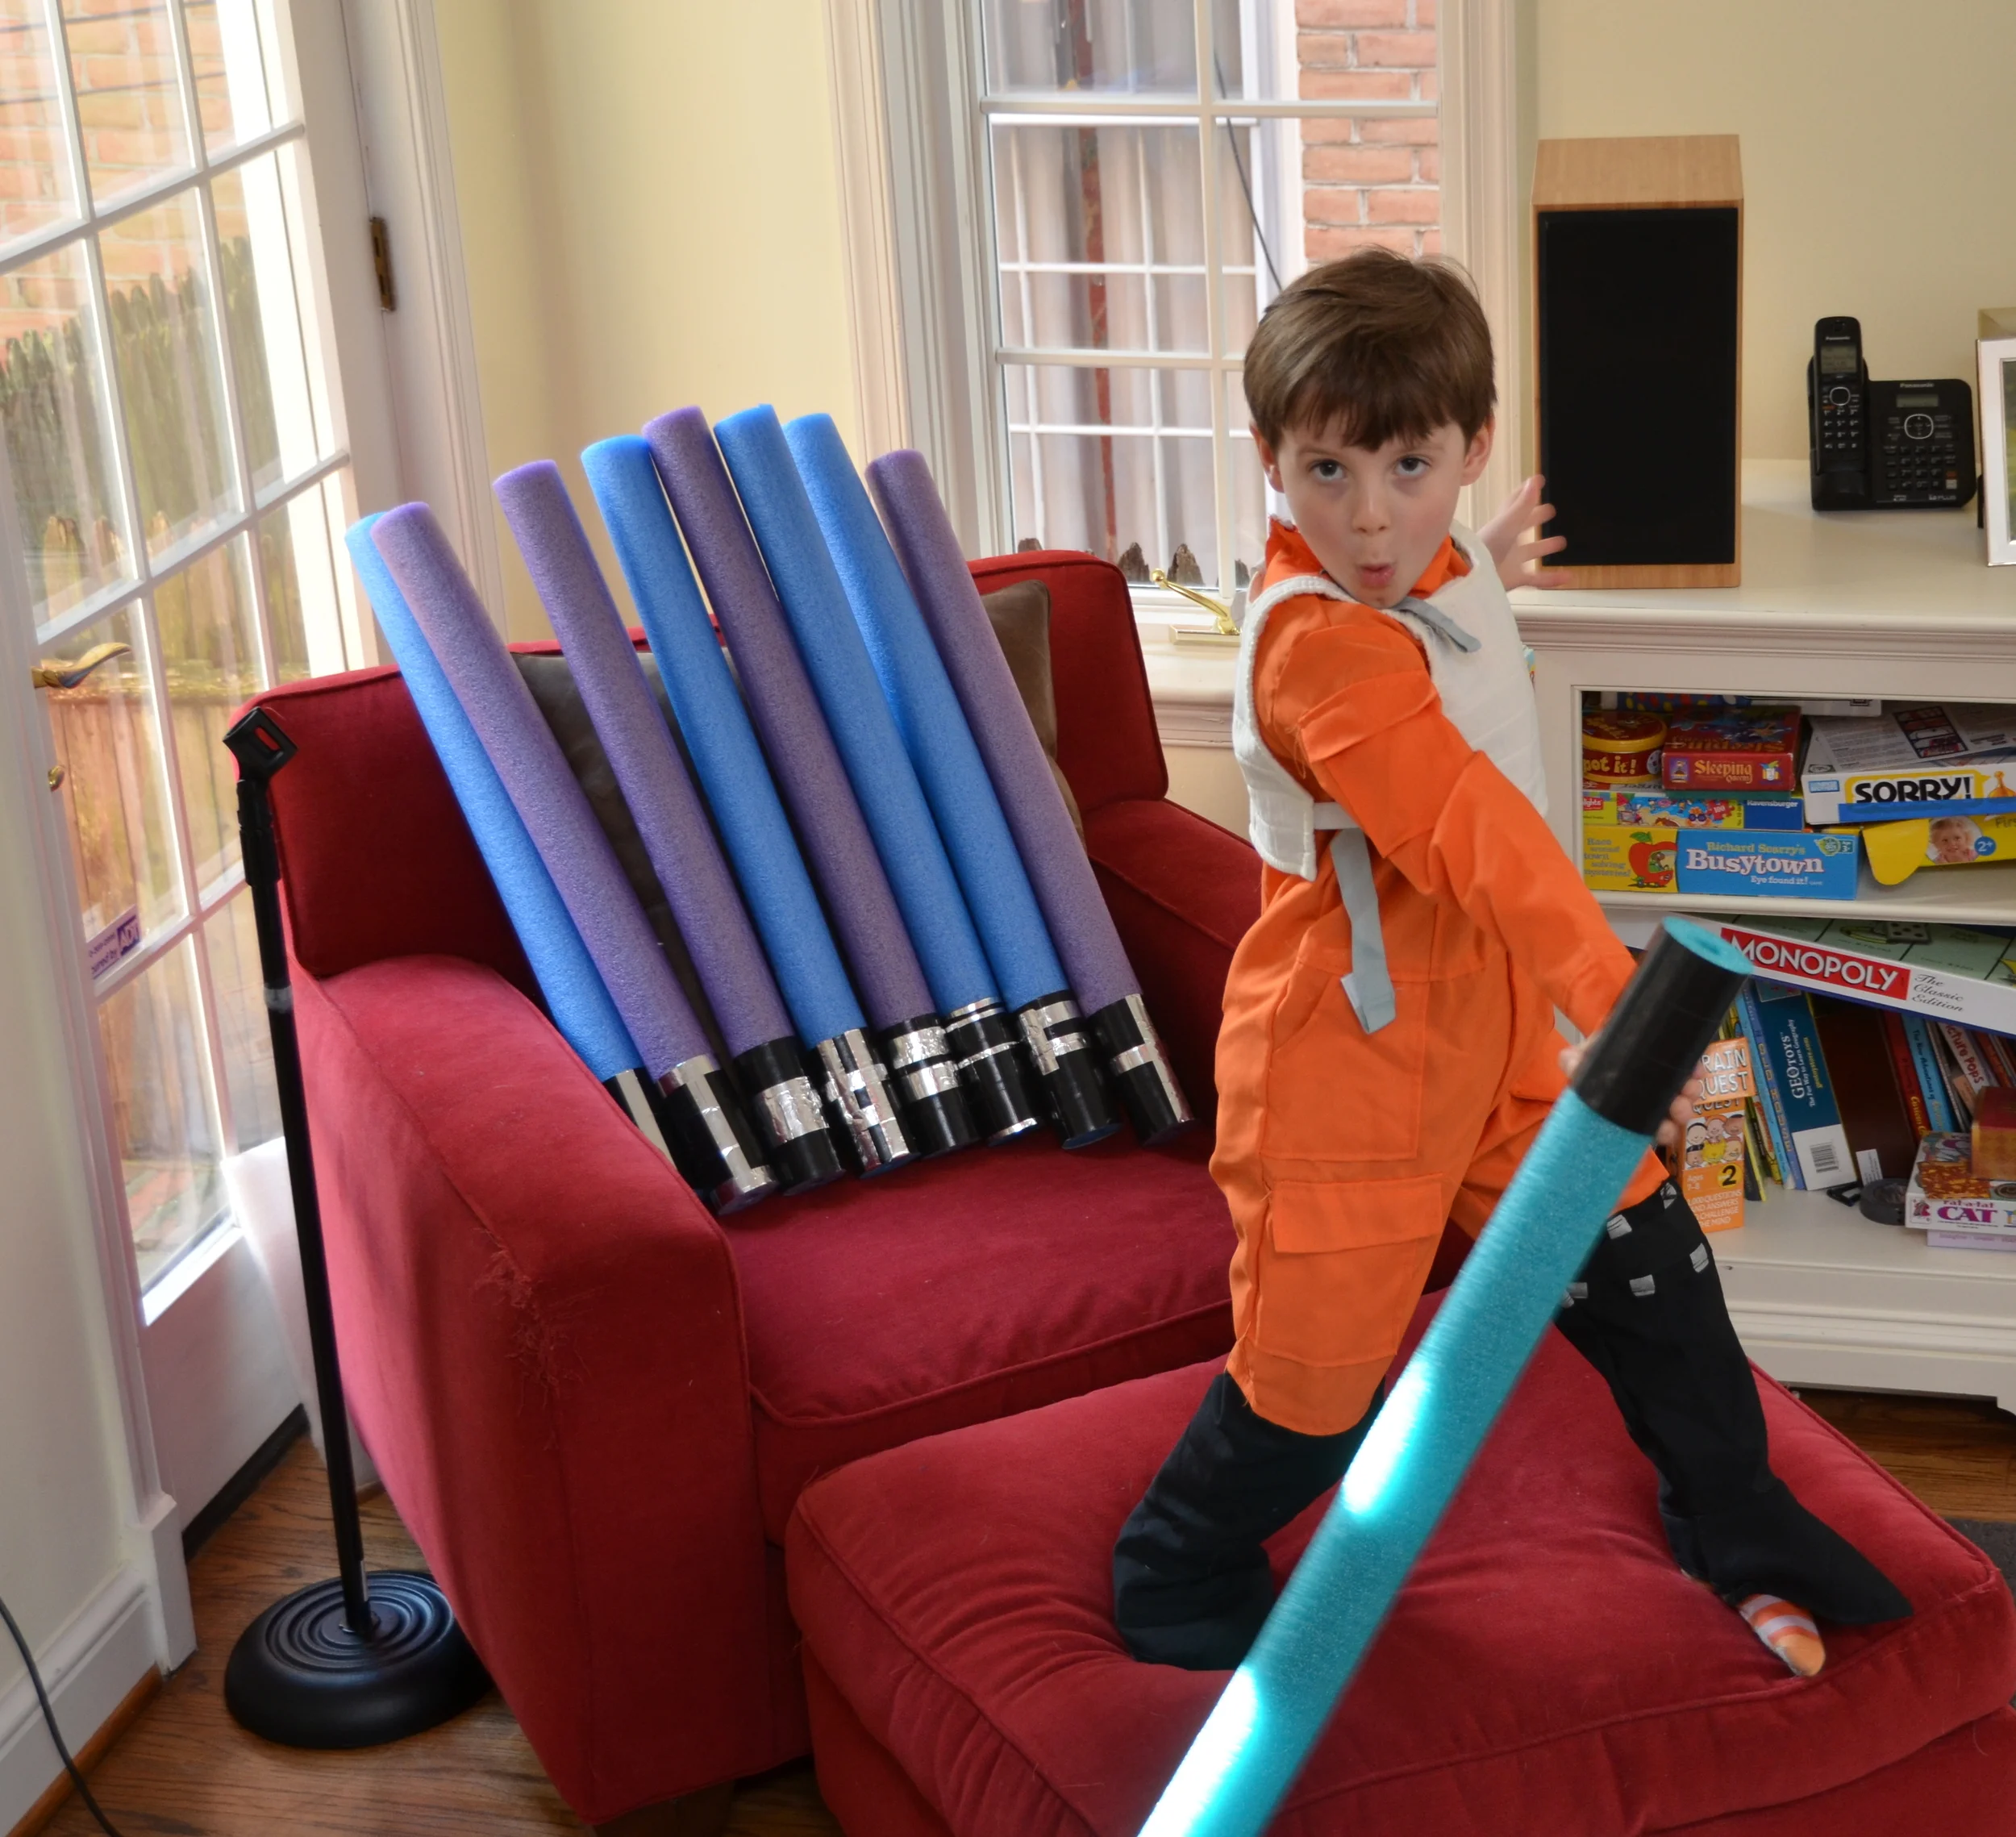
Version 1: The Simple Saber

Needs for 1-2 sabers: a swim noodle in your preferred saber laser color; aluminum tape (or silver Duck/duct tape though the aluminum tape is preferable); black Duck/duct tape; a sharp knife; scissors.

www.em-i-lis.com

One standard swim noodle will yield two single sabers or one double, a la Darth Maul. If you plan to make two, measure the noodle and, using your sharp knife carefully, slice it crosswise at the midpoint. Using the aluminum tape, tightly wrap one end of each noodle half. This is the hilt foundation. Then, using your scissors to cut strips, knobs and such, either recreate your favorite character's hilt or make up your own.

If you are making a double-sided saber, do not cut your noodle. Instead, keep it whole and follow the above instructions regarding aluminum and black tape use but placing the hilt at the noodle midpoint.

www.em-i-lis.com

www.em-i-lis.com

www.em-i-lis.com

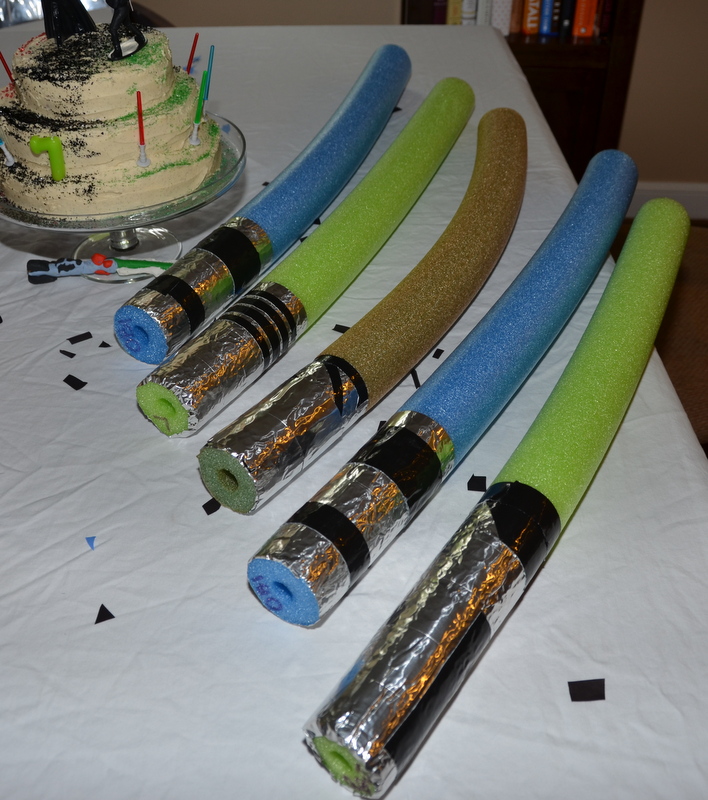
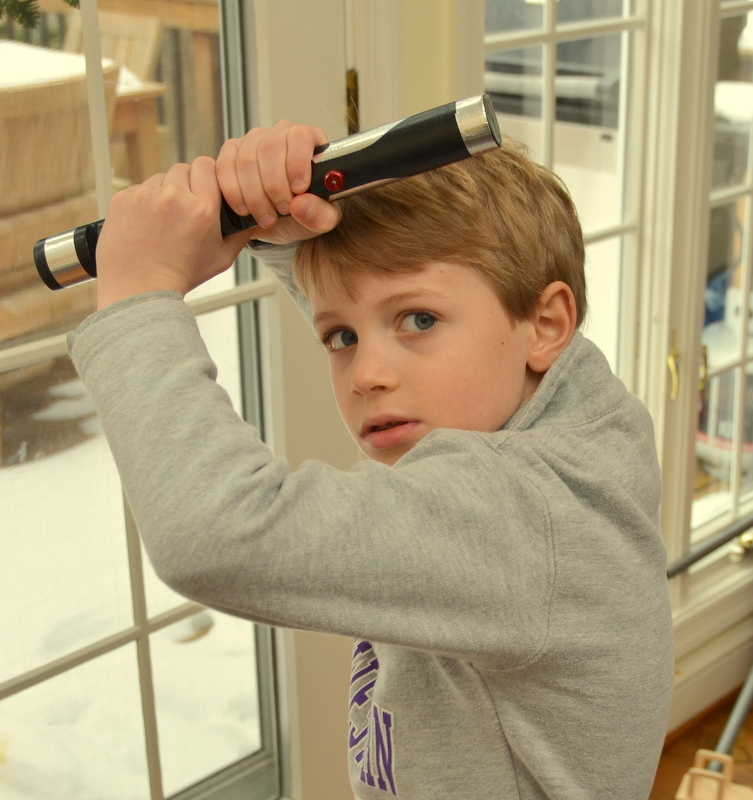
The Simple Saber is great for kids (and their parents) who want to engage in full battle with no worry of injury. Swim noodles really can't do much damage, so kids can beat the crap out of each other in battle and you don't need to be too concerned. This was a GREAT birthday party activity and take-away (made one for each guest).

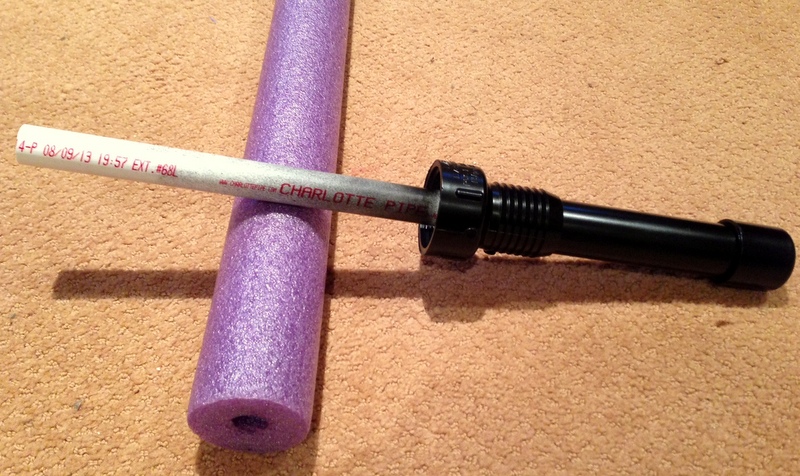
Version 2: The More Complex Swim Noodle Saber - PVC Hilt *This does not make a double-sided saber.

Needs for 1 single saber: a swim noodle in your preferred saber laser color; aluminum tape (or silver Duck/duct tape though the aluminum tape is preferable); black Duck/duct tape; a sharp knife; scissors, matte black plastic-compatible spray paint; 1 two-foot section of 1/2" PVC pipe; one two-foot section of 1" PVC pipe; one 1" PVC pipe cap; one 2" threaded female PVC to barbed adapter; PVC cement; grinder or some other way to shave down the 1/2" PVC cap to fit inside the 1" pipe.

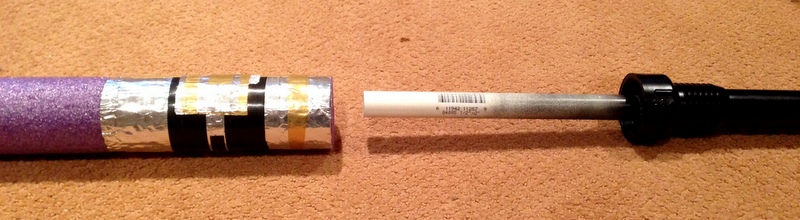
As for the Simple Saber, slice your noodle in half at the midpoint. Cut the 1/2" PVC pipe in half. Cut the 1" PVC pipe in an 8" section.  The 1/2" PVC will just barely fit into the core of the noodle; this is good because you don't want the noodle flying off during battle. Grind the 1/2" PVC cap down until it can just barely fit inside the 1" PVC pipe (the starting exterior dimension of a 1/2" PVC cap is more than 1").   Attach the cap to the 1/2 pipe with the cement and then apply more cement to the outside of the cap and insert it into the 1" PVC pipe.   Now you'll have the two pipes aligned exactly coaxially.

www.em-i-lis.com

Then add some additional cement to the barbed adapter and position it over the the end of the 1" pipe to make the to of the hilt.   Finally, cement the bottom cap in place.   After two hours, the cement should be cured.   Spray paint with plastic-compatible paint. You don't need to paint the length of pipe that fits into the noodle.

www.em-i-lis.com

www.em-i-lis.com

www.em-i-lis.com

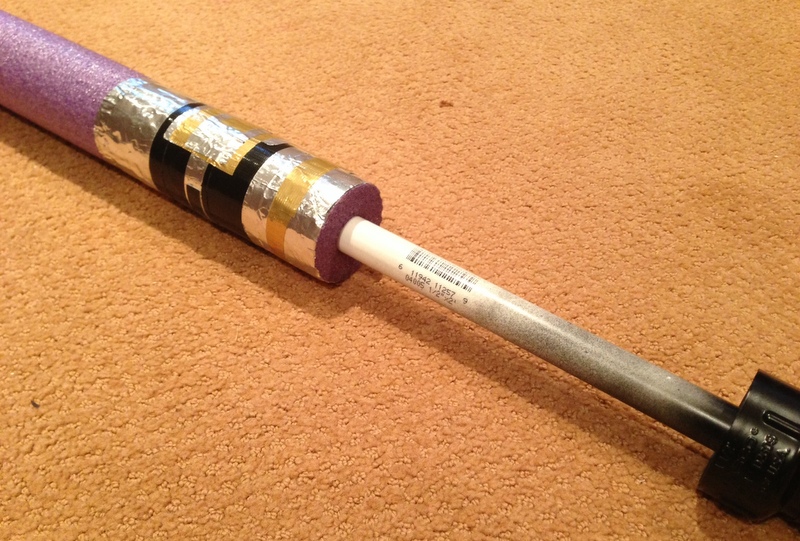
The Saber with PVC hilt version is great because you can switch saber laser colors based on who you're pretending to be. For example, Mace Windu has a purple saber while Darth Vader's is red. Luke had both green and blue sabers. Yoda's is green. And so forth.

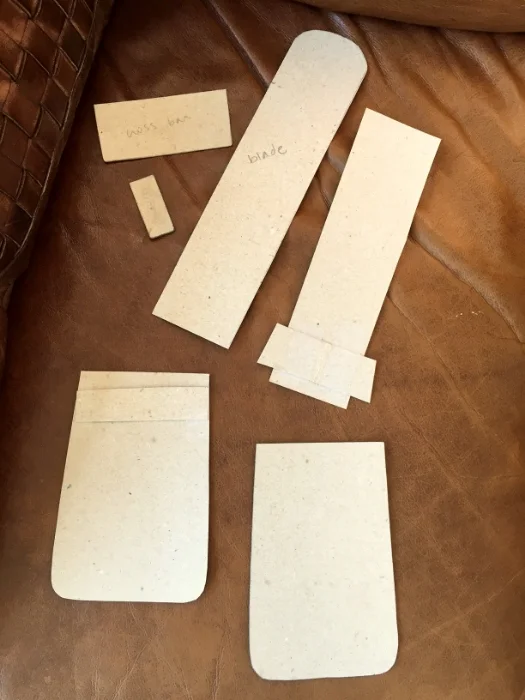
Version 3: The Most Complex Hilt, No Laser (Yet) *This is an artful approach for fans who simply want to wear an awesome yet retracted saber on their belt. We've not yet attached a laser.

Needs: 1 one-inch wooden dowel; sandpaper; hacksaw; aluminum tape (or silver Duck/duct tape though the aluminum tape is preferable); black Duck/duct tape; scissors; matte black spray paint; short silver screw with large top; red Sharpie; clear spray lacquer.

Carefully research the hilt you wish to copy, unless you are creating your own. Jack wanted Qui-Gon Jinn's hilt, and this picture guided his and Tom's carpentry and subsequent paint/tape additions.

Qui-Gon Jinn's light saber hilt

Using a hacksaw and drill, Tom cut away sections from the dowel by first drilling holes and then cutting down with the hacksaw to meet the edges of the drilled holes.  Jack then smoothed them out with sandpaper. They screwed in a screw, colored the top with red Sharpie and later coated it with lacquer because Sharpie rubs off of metal after a while. The red screw was Jack's idea; stylistically, I love it!

www.em-i-lis.com

www.em-i-lis.com

You can't see it here, but Tom attached a piece of a plastic bottle (the plastic top of the spray paint) as a clip so that Jack can hang the hilt from his belt.

Go, fans, GO!